


Musical Purse!
Yay! I finished! I don't really know how long it took me since I took a break to eat some pizza...and check my email...and clean my desk.... If I sat down and started without stopping, I'd say an hour and a half or two hours? Oh, and I was taking pictures along the way, so really like an hour and a half. Maybe only an hour if you're super motivated!
I got the inspiration for this purse from a book I bought earlier this year: One Yard Wonders (click on the link to see it on Amazon.) It's a fantastic little book (and by little, I mean 101 projects...) all made with one yard of fabric! For this purse, I somewhat followed the instructions for "Child's Messenger Bag" buuuut I tweaked it. :) First off, I used two different prints of fabric instead of two. In addition, I inserted an extra layer of fabric in the main portion and the flap of the bag for extra durability. Also, I lengthened the strap so it would be long enough for my sister to wear across her body (the pattern has it set for a toddler). The last difference is that I didn't put any velcro closure on the flap.
Since I took several pictures while making this, I grouped some of the pictures together to keep the post from being a mile and a half long. Click on the pictures to see them larger and more detailed. I know they're a bit hard to see here! PS The bag I made came out to be about 10"wide and about 12" tall.

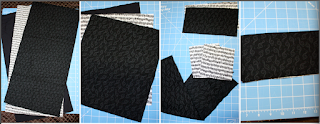
- Cut out your pieces! When you look at all of the following pictures keep this in mind: for this purse I have the outside (black with notes), inside (white), and the lining (solid black that seems to have a blue hint compared to my other black fabric! haha).
- Picture 1: Body of bag (mine is 12.5" wide and 26" tall with the longer end parallel to the selvage). If you're making different measurements make the width equal to [width of finished purse + ~2" seam allowance].
- Picture 2: Flap of bag (mine is 10.5" wide and 12" tall with the longer end parallel to the selvage).
- Picture 3: Inside Pocket & Strap I made the pocket 9" wide and 5" tall. I cut one piece to match the inside and one piece to match the outside. You can do it however you like! For the strap, you can use one long piece (make sure you cut the long end parallel to the selvage so it won't loose shape), or you can do a patchwork look...whatever you like! I had one long piece of the outside fabric and two square of inside fabric to give a little contrast to the strap. My long piece measured 39"long x 5" wide and each square was 5" by 5".
- Picture 4: Assembling the pocket Pin the pocket pieces together, right side together. Sew the pieces together on three sides. On the fourth side, leave room to turn the pocket back right side out. It doesn't show in this picture (but you can see it in later pictures), but after turning and ironing, I sewed a seam across the unfinished portion of the pocket, and this because the top of the pocket.

- Getting everything ready to assemble!
- Picture 1: Basting I basted the lining to the inside pieces on both the body of the bag and the flap of the bag.
- Picture 2: Pocket I pinned and sewed the pocket close to the top edge (about 3" down). Only sew the sides and bottom. (Now you see the top seam on the pocket? :) )
- Picture 3: Strap Assembly I pinned and sewed the contrasting squares to the end of the longer piece of the strap (right sides together) and ironed the seams. In this picture you can see before and after ironing the seam.

- Strap and Flap!
- Picture 1: Sew the Strap Fold the strap in half lengthwise, right sides together, and sew down the length.
- Picture 2: Flip the Strap This is the part where you sit down and watch TV for a little bit! :) Turn that strap right side out and iron it! Afterwards, sew close to the seam on each long side of the strap (can be seen in later pictures...I used contrasting thread because I love that look...and it's handy for pictures for tutorials!! :) )
- Picture 3: Sew the flap pieces Place the inside (that's already basted to the lining) and outside pieces together, right side together. Sew along the sides and bottom. Leave the top open. Clip the corners!
- Picture 4: Flip and Stitch Turn the flap right side out, press, and sew close to the edge on the two sides and bottom.

- This is the most complicated part of this purse...but definitely do-able!! :)
- Picture 1: Starting the folding Fold the outside piece in half (hamburger style) so that the right sides are out. Pin along the fold so it will stay in place for now.
- Picture 2: Fold the top layer of fabric down, towards you, so that the fold is about 1 inch. Pin this fold as well.
- Picture 3: Pick up the entire outside piece, holding all the layers of fabric that are folded. Make sure the top edges meet. Looking at this picture, you can see the resulting new fold that forms when you pick up the fabric. Pin along this new fold (it sort-of reminds me of a paper lunch bag...)
- Picture 4: Getting close to more sewing This picture shows what it should look like after you've pinned all the folded layers together and start to remove the inside pins. So if you opened up the "folder" you've created, this is what you would see. At this point, the right sides of fabric are together.

- Yay! Halfway done with folding!!
- Picture 1: Sewing the sides Sew along the full length of each side (not the bottom or top edge). Remove pins and you're done with the complicated part of the outside!!
- Picture 2: Rewind and do all the same to the inside... Start with the inside layer facing you (lining to the middle). And...follow the above instructions again!
- Picture 3: Just a checkpoint This is what the inside will look like once it's all folded and pinned and ready to sew up the sides. The seams you already see are the seams used to baste the lining to the inside layer.
- Picture 4: Yay done with folding! Looking into the inside layer after it's all folded and sewn! Cute pocket, huh?
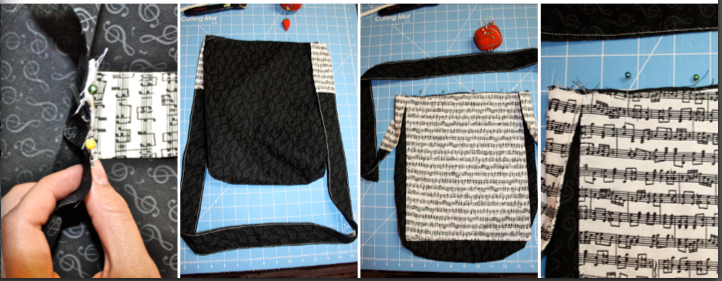
- So Close!
- Picture 1: Pin the Strap to the Outside Pin right sides together (obviously there may not be a "right" side to the strap, so whichever side you want to be on the outside). Pin the center of the strap aligned with the side seam of the outside of the bag. Baste in place.
- Picture 2: Another checkpoint... This is what it looks like at this point!
- Picture 3: Attaching the flap Pin the flap to the bag, right sides together (and raw edges aligned).
- Picture 4: Baste the flap Baste the flap in place!

- Finishing Touches!!
- Picture 1: Put the outside (with strap attached) into the inside. Make sure the flap (flipped out...haha that sounded almost redundant!) is facing the pocket. Also make sure the strap isn't twisted at the ends where it connects to the purse body.
- Picture 2: Pin in place and sew! Leave about 4 or 5 inches unsewn on the side opposite the flap and pocket so you can turn the purse right side out.
- Picture 3: Checkpoint again! See the turning space I left?
- Picture 4: Finished! Once you've turned the purse right side out, iron the top front edge and sew close to the edge, closing the turning space you left.


Super cute right?? :)
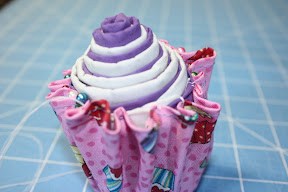
Another project I need to do will be inspired by this little garbage bag I had next to my sewing machine..


This is so cute! I love it and what a fabulous tutorial! Thanks for linking up to Hoo's got talent!
ReplyDelete